How to Install Underfloor Heating
If you’re considering underfloor heating, you’ll need to understand both the complexities and rewards of this installation project. This energy-efficient heating solution can transform your home’s comfort while potentially reducing your energy bills, but it requires careful planning and precise execution. From choosing between water-based or electric systems to calculating heat requirements and mapping out pipe layouts, each step demands attention to detail. While DIY installation is possible for experienced homeowners, the intricate nature of the process means you’ll want to know exactly what you’re getting into before lifting that first floorboard.
Key Takeaways
- Clean and prepare the subfloor thoroughly, install moisture barrier, and add thermal insulation to prevent heat loss.
- Plan the pipework layout based on room dimensions and heat requirements, ensuring proper spacing between pipes.
- Install heating elements or pipes securely, following manufacturer specifications for spacing and fastening methods.
- Conduct resistance and pressure tests before, during, and after installation to verify system integrity.
- Apply self-leveling compound over heating elements and allow proper curing time before adding final flooring material.
Planning Your Underfloor Heating Project
As Sydney’s leading underfloor heating experts, we recognize that successful installation starts with thorough planning. Over our years of experience, we’ve learned that proper preparation guarantees your underfloor heating system performs efficiently and reliably for years to come.
The first step in planning your installation is evaluating your space. You’ll need to measure your room’s dimensions carefully, as this determines your pipework layout and the amount of materials needed.
We’ll help you conduct a heat loss calculation, which is vital for determining the required heating output and best pipe spacing for your specific space.
Your choice of flooring material greatly impacts system performance. Different materials conduct heat differently, so we’ll guide you through selecting the most suitable options for your needs.
Insulation requirements are equally important – we recommend high-density polystyrene under the slab to maximize efficiency and prevent heat loss through the subfloor.
To guarantee best performance, we’ll help you plan your zone heating setup. This involves dividing your system into separate zones, allowing for independent temperature control in different areas.
We’ll also evaluate your floor preparation needs, as proper substrate preparation is essential for successful installation.
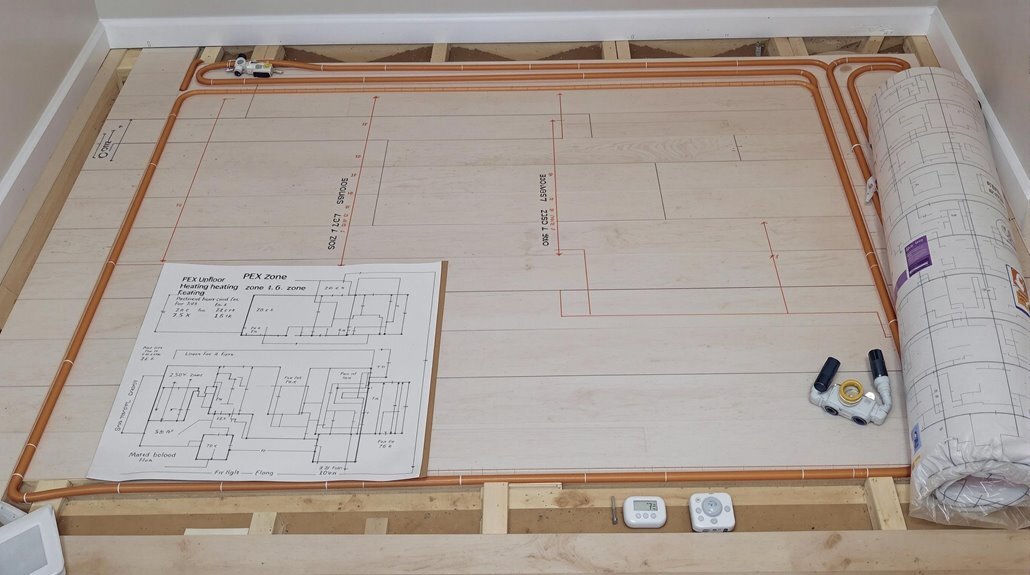
The final planning stage involves designing your pipework layout. We’ll consider factors like loop lengths, manifold positioning, and pipe spacing to create an efficient system.
Using our specialized CAD software, we’ll enhance your layout to guarantee even heat distribution throughout your space while maintaining recommended loop lengths of under 100m for consistent performance.
Essential Tools and Materials
Having the right tools and materials is vital for a successful underfloor heating installation. At Floor Heating Today, we’ve found that being well-prepared with proper equipment guarantees a smoother installation process and better results.
You’ll need basic measuring tools like a tape measure and multimeter to guarantee accurate layout and electrical safety throughout the project.
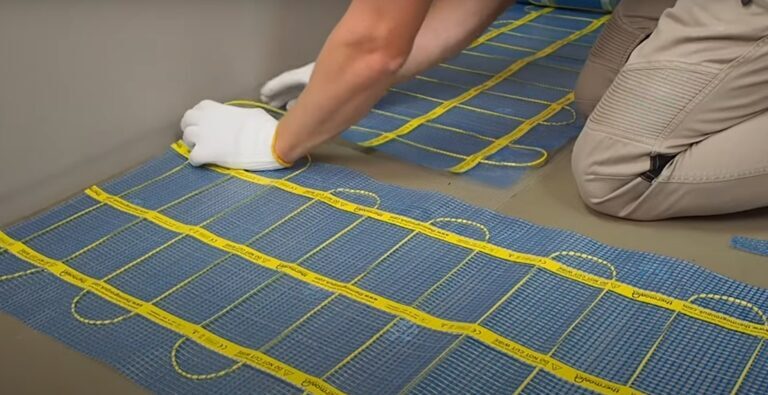
The core components of your installation will include electric underfloor heating mats, which form the basis of your heating system. You’ll also need a thermostat and floor sensor to regulate temperature effectively, along with insulation boards to maximize energy efficiency.
Don’t forget self-leveling compound to create a perfect surface over your heating elements.
Here are the four significant stages where proper tools and materials make all the difference:
- Preparation Stage: Use protective gloves and measuring tools to safely prepare your workspace and accurately measure the floor area.
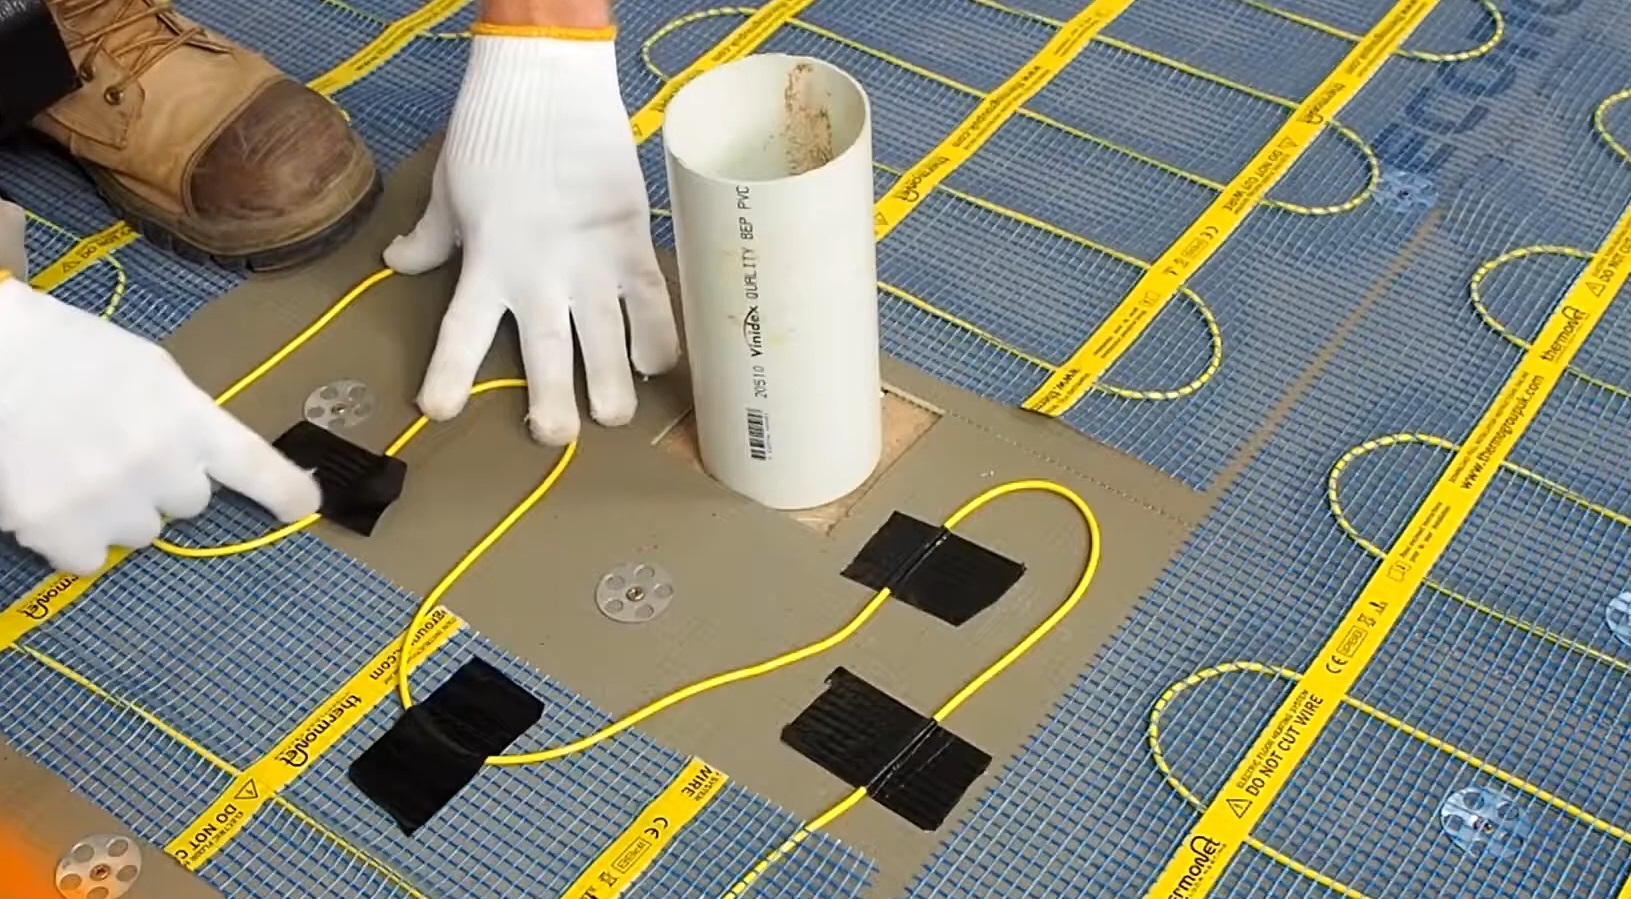
- Installation Stage: Apply the heating mats and connect them using Wago connectors for secure electrical connections.
- Testing Stage: Employ your multimeter to verify all connections are working correctly before laying the final flooring.
- Finishing Stage: Apply self-leveling compound and install the thermostat system for complete functionality.
Remember to store your tools and materials in a dry, safe place during installation.
Keep electrical components separate from water-based materials, and always double-check that you have spares of important items like floor sensors. This preparation will help avoid delays and guarantee your installation proceeds efficiently.
Preparing the Subfloor
With proper subfloor preparation being critical for successful underfloor heating, you’ll need to start by confirming your surface meets all important requirements.
The cleaning and preparation phase involves removing all dust, dirt, plaster remnants, and small stones from your subfloor. You’ll want to smooth out any irregularities and fill cracks, using self-leveling compounds for gaps larger than 2-3mm.
Next, you’ll need to focus on moisture insulation and thermal insulation. Install a moisture barrier using 0.2mm polyethylene film or liquid DPM over concrete subfloors, maintaining relative humidity between 45% and 65%.
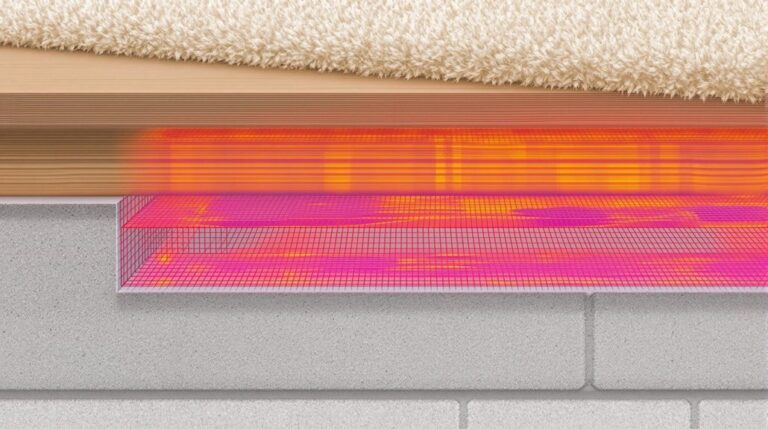
The thermal insulation layer is essential as it prevents heat loss and guarantees proper circulation of heated air throughout your space.
When considering subfloor material, you’ve got several options. Concrete slabs work excellently with hydronic systems due to their superior heat retention.
While plywood and OSB are also suitable choices, they don’t retain heat as effectively as concrete. Your choice of subfloor material will directly impact both your flooring options and the heating installation process.
Before proceeding with the installation, you’ll need to remove any existing floor surfaces if you’re working with a concrete subfloor that’ll house hot water radiant heating.
It’s crucial to follow proper temperature controls during and after installation, including a heating-up and cooling-down phase as per BS8201 standards.
This careful attention to temperature management helps prevent damage and guarantees your system functions at its best from day one.
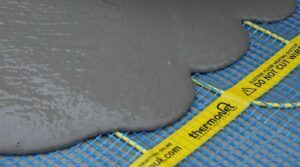
Installing Insulation and Pipework
The success of your underfloor heating system depends heavily on proper insulation and pipework installation. At Floor Heating Today, we recommend using high-density PIR insulation boards with a minimum thickness of 125mm to maximize efficiency and reduce heat loss.
You’ll need to lay aluminum sheeting on top of the insulation, followed by a slip membrane to prevent any potential leaks during the screed installation.
When it comes to installing pipework, you’ll want to focus on proper pipe spacing and secure fastening. We use ultra-flexible Multitubo PE-RT and Composite pipe materials that are both durable and easy to work with.
The pipes should be carefully looped across the entire floor area, with multiple circuits for larger spaces. It’s essential to have professional installation for connecting pipes to the manifolds and conducting pressure testing before the screed is laid.
Here are four important steps we follow for ideal installation:
- Lay PIR insulation boards across the entire floor area, ensuring no gaps between boards
- Install aluminum sheeting and slip membrane for enhanced heat distribution
- Connect pipes to manifolds and create evenly spaced loops using pipe staples
- Perform thorough pressure testing to verify system integrity
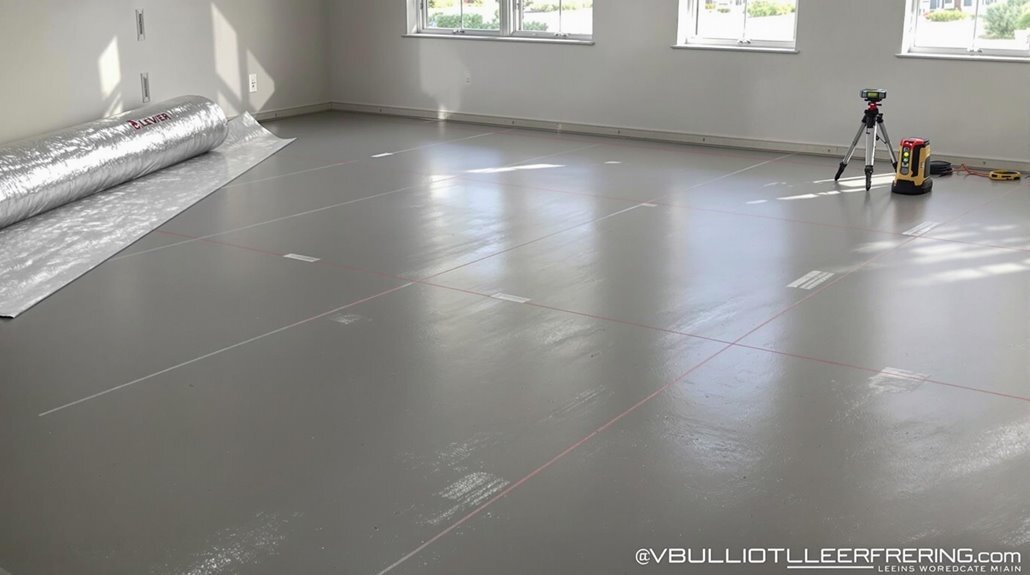
Laying the Screed
Proper screed installation forms a vital foundation for your underfloor heating system’s performance. When laying underfloor heating, you’ll need to verify your building is completely weathertight before installing the screed. We recommend starting with a polythene membrane over your insulation, guaranteeing 100mm overlaps at the joints.
Installing the screed requires careful attention to depth requirements. At Floor Heating Today, we work with various screed types, each with specific minimum screed depths: liquid screed (35-45mm), low-profile systems (22mm), and traditional sand and cement (65mm).
You’ll need an even and flat surface to achieve ideal heating efficiency, and we use tripod depth gauges to confirm perfect leveling.
The pipe layout must be secured properly before screeding begins. We install expansion joints at door thresholds to prevent cracking and fit isolation strips around walls, stairs, and pipework.
Professional application is essential – that’s why we only use specialist contractors who understand the intricacies of different screed types.
The drying and curing process is equally important. After installation, allow 24-48 hours of initial drying without drafts. After seven days, you can start forcing the drying process using underfloor heating at 20-25°C, gradually increasing the temperature over two weeks.
We’ll use dehumidifiers after 72 hours to accelerate drying times while maintaining proper ventilation. For best results, protect your newly laid screed from damage and avoid covering it during the drying period.
System Testing and Activation
Successful underfloor heating installation requires thorough testing before activation to guarantee peak performance and safety. At Floor Heating Today, we emphasize three critical testing phases: cable resistance testing, insulation resistance testing, and pressure testing.
For cable resistance testing, you’ll need to use a multimeter to measure readings between live and neutral earth braids. Compare these readings with factory specifications, ensuring they fall within -5% to +10%. You must perform this test three times: before installation, after laying the cable, and after applying the floor covering.
The system integrity check involves pressure testing to verify all connections are secure. Start by closing the primary isolation valves and preparing the manifold by opening circuit isolator valves and flow meters. You’ll need to check all couplings and tighten them if necessary.
Here’s what you need to know about commissioning the system:
- Begin with water temperature at 25°C on day one
- Increase temperature by 5°C daily until reaching 50°C
- Allow up to a week for full temperature distribution
- Maintain primary water temperature at minimum 60°C
For insulation resistance testing, use a mega meter set to 500 volts to test between center cores and earth braid. Readings should be at least 1000 megaohms, which helps detect any small holes in the insulation layer.
Once all tests are complete and readings are within specifications, your underfloor heating system is ready for regular operation.