If you’ve been living with less-than-ideal heating solutions, it’s time to reflect on retrofitting underfloor heating in your home. You’ll find that this modern approach to home comfort can transform your living space while potentially reducing your energy costs. Whether you’re dealing with cold floors in your bathroom or seeking whole-house heating efficiency, underfloor heating presents a viable solution that works beneath your existing flooring. Before you make any decisions, though, you’ll need to understand the vital factors that determine whether your home is suitable for this upgrade and which system will serve you best.
Key Takeaways
- Assess your home’s suitability by evaluating floor types, subfloor conditions, and room layouts before choosing between electric or hydronic systems.
- Clean and prepare the subfloor by filling cracks, installing moisture barriers, and adding proper insulation to prevent heat loss.
- Install insulation boards, lay heating pipes or electric mats in a snake pattern, and position manifolds correctly for system control.
- Connect the system to power sources and thermostats, then test gradually by increasing water temperature from 25°C to 50°C.
- Monitor energy usage, check system pressure regularly, and maintain quarterly inspections to ensure optimal performance and efficiency.
Understanding Underfloor Heating Systems
While many homeowners think retrofitting underfloor heating is complicated, understanding the basics of these systems will help you make informed decisions about installation. At Floor Heating Today, we’ve seen that two main types dominate the market: electric and warm water systems. Each offers unique advantages depending on your specific needs.
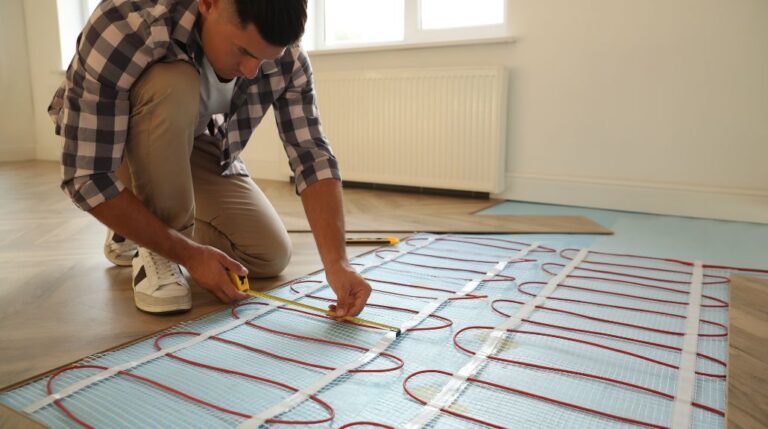
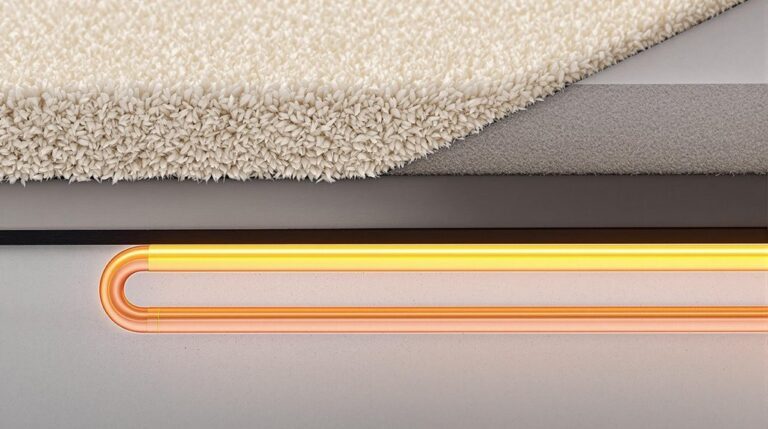
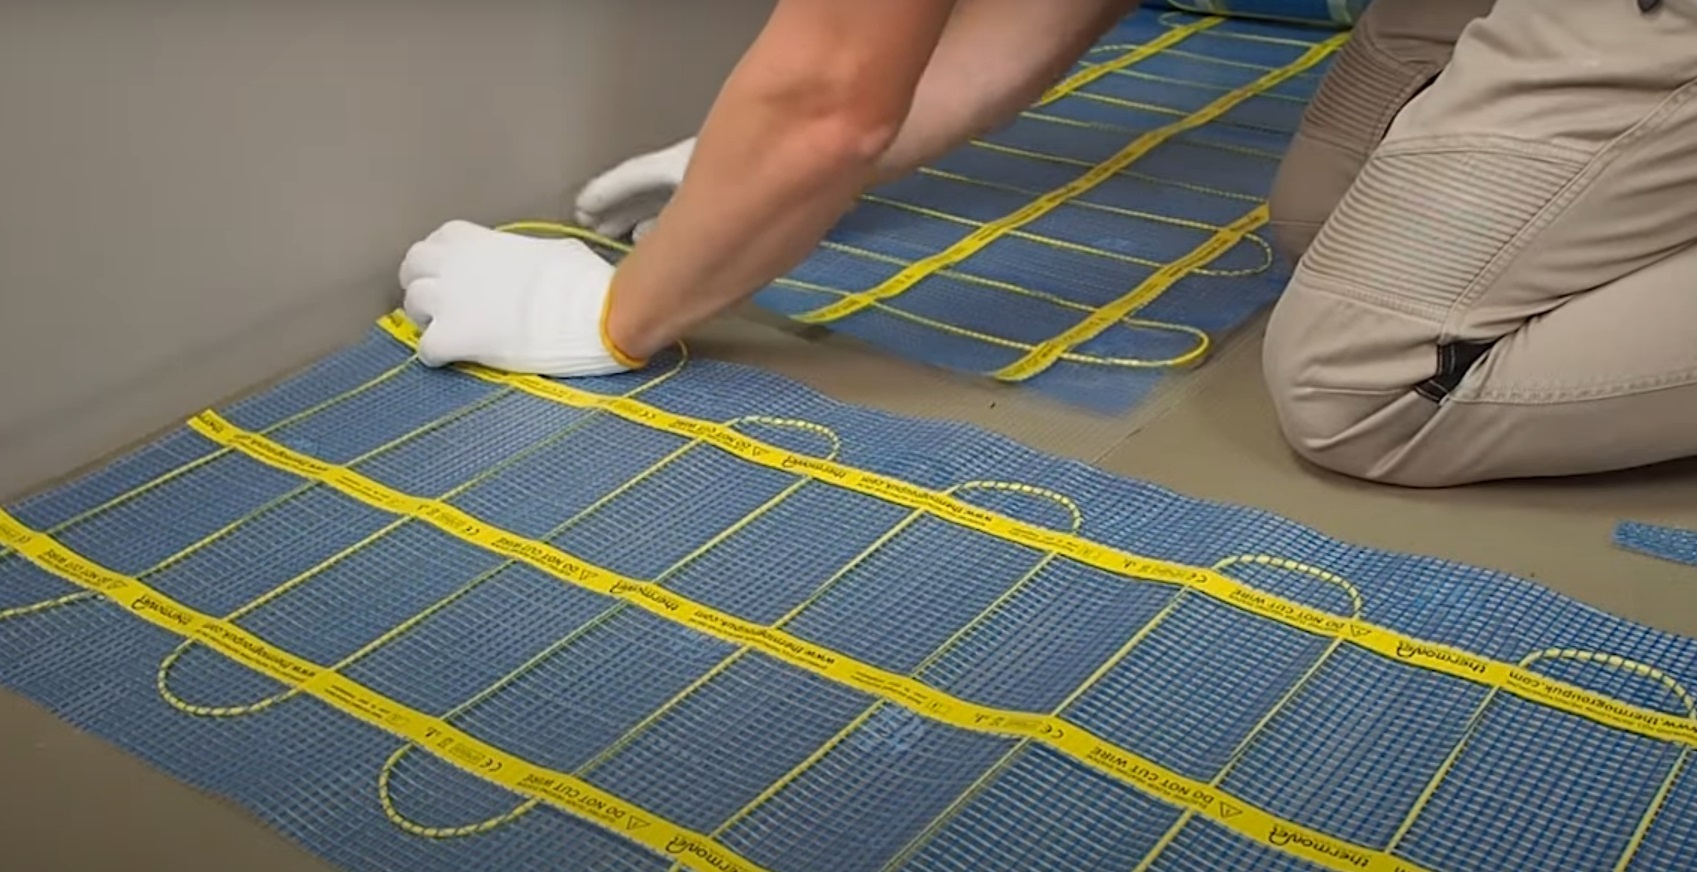
Electric underfloor heating uses heating mats with embedded cables, making it particularly suitable for smaller areas like bathrooms or kitchens. If you’re retrofitting a single room, this option often proves more cost-effective.
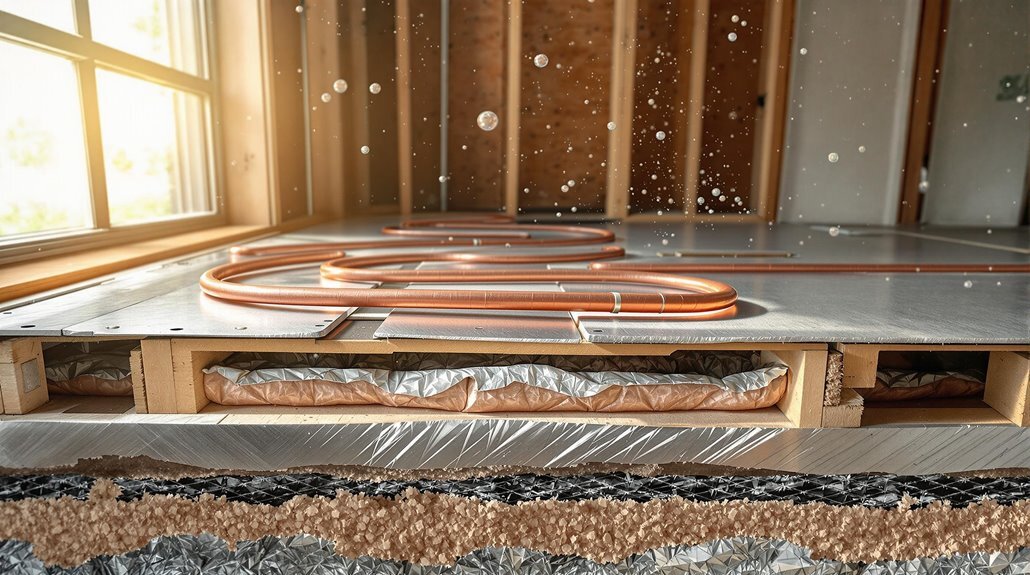
In contrast, warm water systems circulate heated water through pipes and work exceptionally well for larger spaces or whole-house installations.
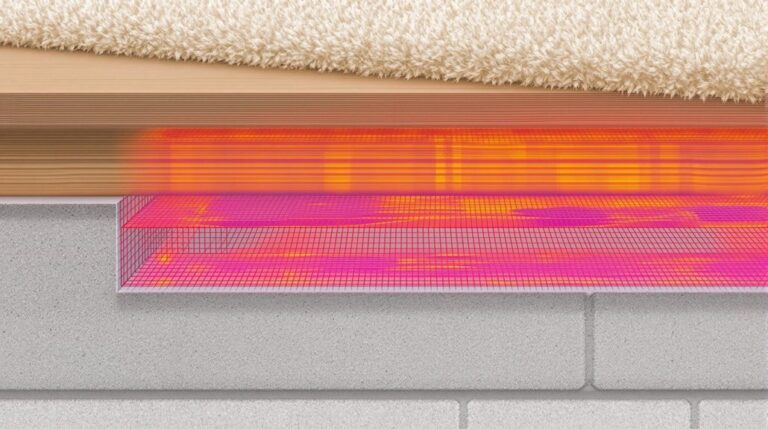
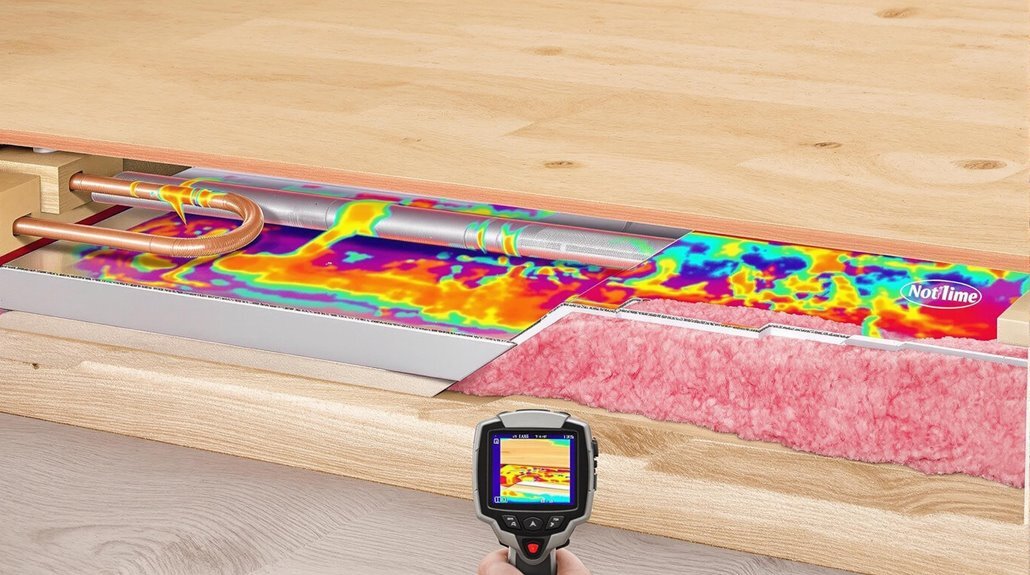
The principle behind both systems is straightforward: they distribute heat evenly through your floor via radiant heat. When retrofitting either type, proper insulation plays a vital role in directing warmth upwards into your living space rather than letting it escape downward.
You’ll need key components like pipes or heating mats, along with a manifold or thermostat to control the system effectively.
During installation, we’ll guarantee your system includes all essential elements: durable pipes made from materials like PEX or PB for water systems, or quality heating mats for electric options.
The control system, typically featuring modern thermostats, allows you to regulate temperature precisely.
Planning Your Retrofit Underfloor Heating Project
Success in retrofitting underfloor heating starts with thorough planning and preparation. At Floor Heating Today, we’ve found that the first step is evaluating your home’s specific heating needs and determining which rooms will benefit most from underfloor heating. Your flooring type plays an important role, as materials like tiles and stone conduct heat more efficiently than wood or carpet.
Before diving into the system layout, you’ll need to analyze your subfloor conditions. Whether you have suspended timber floors or solid concrete will greatly impact the installation approach. We recommend installing proper insulation beneath the heating system to prevent heat loss and guarantee maximum efficiency. Even a thin layer of thermal protection can make a considerable difference, especially with concrete floors.
Professional expertise is essential for a successful retrofit. While DIY might seem tempting, the complexity of underfloor heating systems requires technical knowledge for safe and effective installation. You’ll need to reflect on factors like manifold positioning, pipework layout, and power connections.
The system layout must be carefully planned, accounting for room dimensions and joist bay configurations. Your budget will determine whether an electric or hydronic system is more suitable. While hydronic systems typically cost more upfront, they can offer long-term savings on energy bills.
We’ll help you weigh these options against your specific requirements. Remember, investing in quality materials and professional installation now will pay off through increased home value and reduced heating costs in the future.
Measuring and Costing for Low Profile Underfloor Heating
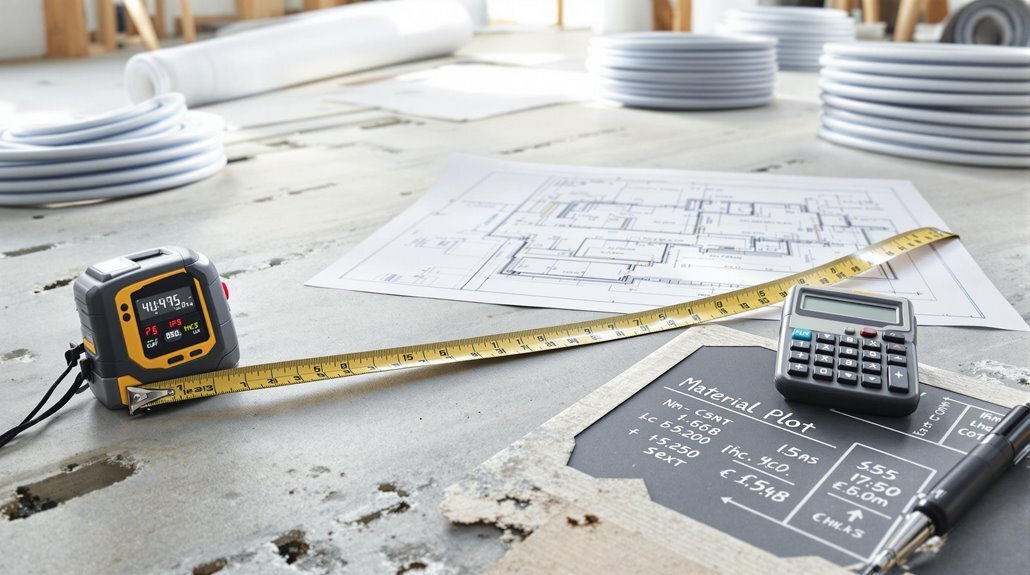
Understanding the measurements and costs involved in your underfloor heating retrofit is vital for project success. At Floor Heating Today, we’ve helped countless Sydney homeowners navigate through the measuring and costing process.
When measuring for your retrofit, we’ll assess your existing floor structure, calculate heat loads for each room, and create a detailed pipe layout plan that takes into account your specific space requirements.
The costing aspect of your retrofit project will depend on several key factors. For wet underfloor heating systems, you’re looking at installation costs between $250-$350 per square metre, while electric systems typically range from $115-$165 per square metre.
While wet systems have higher upfront costs, they offer significant long-term savings through lower running costs of approximately 45 cents per hour compared to electric systems at around $2.30 per hour.
Here are the main elements we’ll take into account when calculating your project costs:
- Existing floor condition and any necessary preparatory work
- Insulation requirements to maximize system efficiency
- System complexity and control options
- Professional installation costs and potential disruption management
When budgeting for your retrofit, it’s important to reflect on both immediate and long-term costs. The initial investment includes the system costs, insulation, and installation, but don’t forget to factor in operating costs.
While the upfront investment might seem substantial, the energy efficiency and comfort benefits of underfloor heating make it a worthwhile investment for your Sydney home.
Choosing the Best Underfloor Heating System for Your Existing Floor
Making the leap to underfloor heating requires careful consideration of which system best suits your home and lifestyle. When retrofitting underfloor heating, you’ll need to choose between wet and electric systems, each offering distinct advantages for different situations.
Electric underfloor heating is often the go-to choice for retrofit projects. It’s thinner, easier to install, and doesn’t require significant floor height adjustments. You won’t need to connect it to your existing heating system, and it works well under various floor types, including tile, stone, and laminate.
The installation process is straightforward, making it perfect for single-room renovations or whole-house upgrades.
Wet underfloor heating, while more complex to install in existing properties, offers superior energy efficiency – about 25% more efficient than traditional radiators. When paired with a heat pump, this efficiency jumps to 40%.
System suitability depends largely on your property’s characteristics and whether you’re willing to undertake more extensive renovation work.
Consider your floor types carefully. Electric systems can work with most floor finishes and don’t require significant structural changes. Wet systems typically need more floor height and are better suited to properties undergoing major renovations.
You’ll also want to think about running costs – while wet systems cost more upfront, they’re generally cheaper to operate long-term.
For maximum efficiency with either system, verify your home is well-insulated and install smart thermostats to maintain consistent temperatures throughout your space.
Essential Tools and Materials for Underfloor Heating Installation
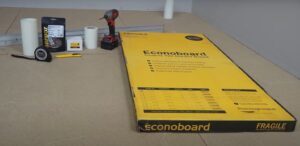
Before starting your underfloor heating retrofit project, you’ll need to gather the right tools and materials. At Floor Heating Today, we recommend organizing your supplies into four main categories: essential tools, insulation materials, heating elements, and additional components.
Let’s start with the essential tools you’ll need for a successful retrofit underfloor heating installation:
- Basic hand tools including a utility knife, drill, and screws for installation work
- A digital multimeter for testing the system during and after installation
- Standard electrical wiring tools for connecting components safely
For insulation, you’ll need thermal materials specifically designed for underfloor heating. This includes non-flammable insulation boards, perimeter insulation foam, and specialized underlay with acoustic properties.
These materials are vital for maximizing your system’s efficiency and reducing heat loss.
The heating elements form the core of your system. You can choose between electric heating mats, flexible cables, or RetroHeat panels depending on your room layout.
Don’t forget to include the necessary electrical connectors and dielectric tape rated for high temperatures.
Finally, you’ll need to take into account additional materials like mesh tape for securing insulation board seams and a quality thermostat and controls for regulating your system.
If you’re installing under tiles, an uncoupling membrane might be necessary to prevent cracking. Some installations may also require a leveling compound to guarantee an even surface for best heat distribution.
Preparing Your Existing Floor for Underfloor Heating Installation
Now that you’ve gathered your tools and materials, proper subfloor preparation will determine the success of your underfloor heating retrofit. The first step in preparing the subfloor is a thorough inspection and cleaning. Remove all dust, dirt, and debris, then check for cracks or irregularities that’ll need filling with self-leveling compounds.
For effective retrofit underfloor heating, you’ll need to address moisture control and insulation. Install a moisture barrier using 0.2mm polyethylene film or liquid DPM to prevent dampness from affecting your system. Thermal insulation is essential – it guarantees heat travels upward into your living space rather than being lost through the subfloor.
Your subfloor type plays an important role in the installation process. Whether you’re working with concrete, plywood, or OSB, verify it’s at least 5/8″ thick and structurally sound. For hydronic systems, you can embed tubes in concrete for ideal heat distribution, while electric systems allow for direct installation of heating mats or cables above the existing subfloor.
When retrofitting, you’ll need to maintain a relative humidity between 45% and 65%. If you’re installing a hydronic system, consider using specialized panels or lightweight concrete above your existing subfloor.
Don’t forget to conduct pressure tests for hydronic systems or resistance tests for electric ones before sealing everything up. Remember, a level and stable subfloor is necessary for even heat distribution and long-term performance of your heating system.
Step-by-Step Installation
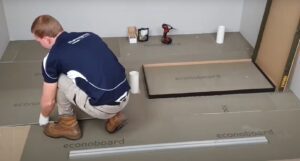
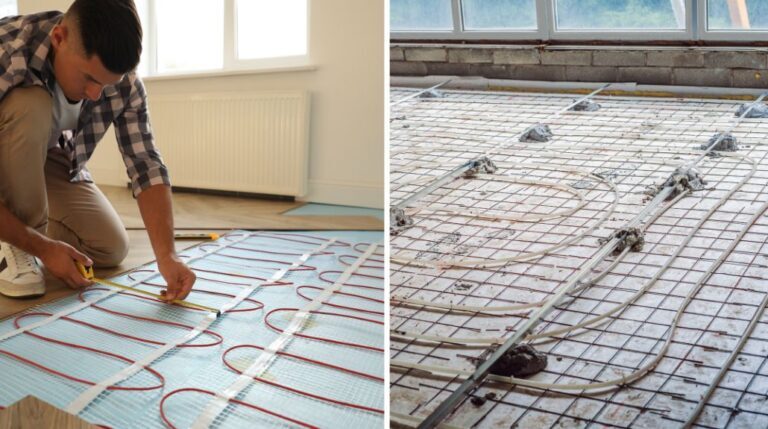
The successful installation of underfloor heating follows a systematic approach that we’ve perfected over 15 years at Floor Heating Today. When retrofitting underfloor heating, we start by laying down high-quality insulation boards to prevent heat loss through the subfloor. These boards must be fitted precisely, with all seams carefully taped to create an uninterrupted thermal barrier.
Next, we install the manifolds on a sturdy wall, making sure they’re positioned correctly to support your heating systems. For hydronic systems, we connect the piping network in a snake-like pattern, while electric systems require careful placement of heating mats. You’ll notice that larger rooms might need multiple loops to guarantee even heat distribution.
- First layer: Install edge insulation foam around the room’s perimeter
- Second layer: Lay and secure insulation boards across the entire floor
- Third layer: Install heating elements (pipes or electric mats)
- Fourth layer: Connect to power source and install thermostats
The final phase involves connecting your system to its power source and installing the thermostats. We’ll thoroughly test everything before laying your chosen floor covering.
Remember that different flooring materials conduct heat differently – tiles and stone are particularly efficient. You shouldn’t rush this process; proper drying time for adhesives is essential before the final system test.
At Floor Heating Today, we recommend professional installation for complex systems to guarantee safety and peak performance. Our Sydney-based team has extensive experience with both electric and hydronic systems, assuring your retrofit project’s success.
Testing and Commissioning Your Underfloor Heating System
Testing and commissioning your underfloor heating system represents one of the most vital phases of the retrofit process. At Floor Heating Today, we’ve found that proper testing guarantees your system will operate efficiently and safely for years to come.
Start by opening valves A and B on day one, setting the water temperature to 25°C. You’ll need to gradually increase this by 5°C daily until you reach 50°C, which helps water in the screed evaporate properly. Before proceeding further, check that all flow meters are open and verify the primary water temperature entering the manifold is at least 60°C.
During pre-commissioning, you’ll want to inspect the system for tightness and secure any loose manifold couplings. It’s important to verify the maximum thermostat is correctly fitted and connected. Set your adjustable limit stat to 55°C if available, and make certain system pressure maintains 1.5 bar with no air escaping from the vents.
The commissioning cycle is vital and typically spans 21 days. Begin by activating zone 1 through your programmer and confirm you’re getting a flame signal. Test each zone individually to verify that room stats are controlling their respective actuators correctly.
For screed floors, expect initial heat-up times of up to 8 hours, targeting 50°C on the flow gauge. For suspended timber floors, aim for 55-60°C.
Remember to conduct moisture testing after completing a full heating and cooling cycle. The system should be off for at least 48 hours before testing, and acceptable moisture levels should read ≤65-75% RH. If needed, repeat the process until achieving appropriate dry readings.
Maintenance and Troubleshooting of Hydronic Heating Systems
Regular maintenance and troubleshooting skills are essential for keeping your underfloor heating system running efficiently. At Floor Heating Today, we’ve found that routine system inspections can prevent most common issues before they develop into costly repairs.
You’ll want to monitor your energy usage regularly and check for unusual patterns that might indicate underlying problems.
When it comes to troubleshooting, we often encounter several common issues in Sydney homes. Air bubbles in the system can restrict water flow and reduce heating efficiency. If you notice uneven heating or cold spots, bleeding the system might be necessary. Check your isolation valves first, as they’re often the culprit behind heating problems.
- Monitor system pressure and address any significant drops or rises
- Test all heating zones regularly to verify proper operation
- Inspect actuators and thermostats for signs of failure
- Keep detailed maintenance records for future reference
For complex issues, don’t hesitate to seek professional assistance. Our experience shows that while some maintenance tasks can be handled independently, certain problems require expert intervention.
If you notice multiple zones not heating, continuous pump operation, or electrical faults, it’s best to contact a qualified technician.
Remember that preventative maintenance is always more cost-effective than emergency repairs. By establishing a regular maintenance schedule and promptly addressing minor issues, you’ll extend your system’s lifespan and maintain its efficiency.
At Floor Heating Today, we recommend quarterly system inspections to keep your underfloor heating performing at its best.
Get a Quote for Retrofit Underfloor Heating with a Professional
Retrofitting underfloor heating (UFH) into an existing home can dramatically improve comfort and energy efficiency. Whether you’re installing underfloor heating on an existing concrete floor or adding a new layer to your current flooring, the process of retrofitting UFH systems requires careful planning. It’s essential to choose the right heat source—whether it’s a boiler or an electric system—and ensure proper insulation to maximize efficiency. By installing underfloor heating, you not only enjoy consistent warmth but also optimize your floor level for even heat distribution.
Consult with a professional to assess your space and explore the best ways to install underfloor heating into your home’s existing setup. With the right approach, it’s entirely possible to create a cozy, energy-efficient environment with a properly installed UFH system.
Ready to upgrade your home with efficient underfloor heating? Contact Floor Heating Today for expert installation and advice on retrofitting an UFH system. Warmth and comfort await—get started today!